

Easter weekend places eggs at the centre of everything — the hunt, the decorating, the deviled egg platter that disappears before anyone has touched the potato salad. The one bottleneck every year is the same: a pot crowded with cold water, a timer nobody watched closely enough, and a batch of eggs with that green ring around the yolk that nobody admits to causing. The air fryer cuts that bottleneck entirely. No pot, no water, no hovering over a stove, and no cracked shells from a rolling boil. Just eggs, a basket, and fifteen minutes.
This method works because dry circulating heat cooks eggs gently and evenly from all sides simultaneously, without the thermal shock of being dropped into boiling water. The result is a white that holds together without rubbering out, and a yolk that sets fully at the centre while staying bright and sulfur-free. Spring is the right moment to master this — whether you are hard-boiling two dozen for an Easter egg hunt or six for a weekday lunch, the technique scales without changing a single variable. Pull out the air fryer and let's get into it.
| Preparation | 2 min |
| Cooking | 15 min |
| Rest (ice bath) | 5 min |
| Yield | 1–12 eggs (scalable) |
| Difficulty | Easy |
| Cost | $ |
| Season | Spring · Easter · eggs |
Suitable for: Vegetarian · Gluten-free · Dairy-free · High-protein · Keto
Ingredients
- 1 to 12 large eggs, straight from the refrigerator
- 1 large bowl of ice water (for the shock bath)
Equipment
- Air fryer (basket-style or oven-style, any brand)
- Tongs or silicone-tipped tongs
- Large bowl
- Ice cubes
- Kitchen timer
Method
1. Preheat the air fryer
Set the air fryer to 270°F (130°C) and let it run for two minutes before loading the eggs. This matters. Placing eggs into a cold basket and letting the machine heat up around them produces uneven results — the whites can start to set unevenly before the internal temperature has a chance to stabilise. A brief preheat brings the cooking environment to a controlled starting point, the same logic that applies when roasting vegetables or baking in a conventional oven. Two minutes is enough; there is no need to wait longer.
2. Place the eggs in the basket
Arrange the eggs directly in the air fryer basket in a single layer, with small gaps between them. Do not stack eggs on top of one another — the hot air needs to circulate freely around each egg to cook it uniformly. If your basket is round, you will typically fit six large eggs comfortably; a larger oven-style air fryer can handle a full dozen. There is no need to oil the basket or add any liquid. The eggs sit in their shells exactly as they are, cold from the refrigerator.
3. Cook at 270°F for 15 minutes
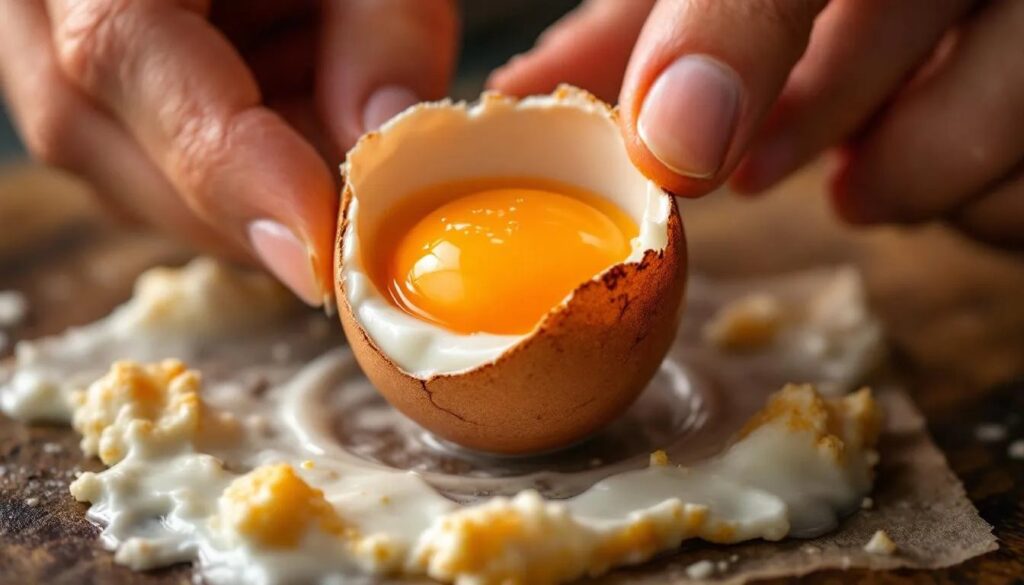
Set the timer for 15 minutes at 270°F (130°C) and do not open the basket during cooking. This temperature range is lower than many air fryer recipes call for because the goal here is a gentle, penetrating heat rather than surface browning. At 270°F, the egg white firms gradually and the yolk reaches a fully set, crumbly-but-not-chalky consistency — the kind that holds together when sliced and sits bright yellow without any grey-green oxidation at the boundary. That discolouration, familiar from overcooked stovetop eggs, happens when hydrogen sulfide from the white reacts with iron in the yolk under excessive heat. The lower temperature and dry environment prevent it entirely.
4. Transfer immediately to an ice bath
The moment the timer goes off, use tongs to transfer the eggs directly into a large bowl filled with cold water and a generous handful of ice cubes. Leave them there for a full 5 minutes. The ice bath does two things: it stops the cooking instantly, preventing any residual carry-over heat from pushing the yolk past its ideal doneness, and it causes the egg white to contract slightly away from the inner membrane of the shell, which makes peeling dramatically easier. Eggs peeled straight from heat tend to tear; eggs peeled after an ice bath slide out cleanly. For Easter dyeing, a clean surface on the white is not incidental — it is the whole point.
5. Peel and use
After five minutes in the ice bath, tap each egg gently on a hard surface to crack the shell, then roll it lightly between your palm and the counter to fracture the shell in multiple places without bruising the white underneath. Begin peeling from the wider end of the egg, where a small air pocket usually sits, making it easier to get a finger under the membrane. Hold the egg under a thin stream of cold water as you peel — the water gets between the membrane and the white and helps the shell release in larger sections rather than crumbling into tiny fragments. Once peeled, the eggs are ready to dye, devil, slice, or refrigerate.
Chef's note
Older eggs peel more easily than very fresh ones. If you bought eggs specifically for Easter this week, they will be fresh enough that the white bonds tightly to the inner membrane — making clean peeling slightly harder. If you have the option, buy eggs a week ahead and refrigerate them before hard-boiling. The pH of the white rises slightly as an egg ages, which loosens the membrane bond and means the shell comes off in a few clean pieces rather than a mosaic of frustrating fragments. For decorating purposes, that smooth, unscratched white surface is worth the forethought.
Pairing suggestions
Hard-boiled eggs lend themselves well to complementary flavours — and at Easter, that context is usually abundant. The mild, creamy richness of a fully set yolk calls for something with enough acidity or freshness to cut through it without competing with it.
For deviled eggs, a light, unoaked Chardonnay from Burgundy or the Loire Valley — think a simple Mâcon-Villages or a Muscadet — provides enough mineral brightness to complement the mustardy filling without overpowering it. A cold lager or a sparkling water with a wedge of lemon works equally well alongside an Easter spread. For a non-alcoholic option at brunch, a sparkling elderflower cordial pressed lightly with water keeps the table festive and bridges the gap between the eggs and whatever spring salad you have alongside them — watercress, radishes, and new-season peas being the natural companions at the end of March.
Background and context
Eggs and Easter are connected across cultures so old that the symbolism predates Christianity itself — spring renewal, fertility, the breaking open of new life. In most European households, hard-boiling eggs before dyeing them has been a domestic ritual for generations, tied to the smell of vinegar and food colouring on the kitchen table in late March. The technique has barely changed since home cooks first realised that a cold start in water, brought up to a boil, gave more control than dropping eggs into an already-rolling pot.
The air fryer variation is recent, driven by the same logic that has made the appliance a fixture in smaller kitchens: fewer dishes, a more predictable outcome, and a cooking environment that does not require monitoring. Food scientists have confirmed that dry heat at lower temperatures achieves a cooked egg without the sulfurous reaction that ruins the yolk's colour — a discovery that has circulated widely in home cooking communities over the past few years. The method translates across cultures and contexts: the same 15-minute, 270°F formula works whether the eggs are going into a Niçoise salad, an Indian egg curry, a Ukrainian pysanka decoration project, or a classic American deviled egg platter for twelve.
Nutrition per egg (approximate values)
| Nutrient | Amount |
|---|---|
| Calories | ~78 kcal |
| Protein | ~6 g |
| Carbohydrates | ~0.6 g |
| of which sugars | ~0.5 g |
| Fat | ~5 g |
| of which saturates | ~1.6 g |
| Fiber | ~0 g |
| Cholesterol | ~186 mg |
Frequently asked questions
Can I cook the eggs straight from the refrigerator, or do they need to reach room temperature first?
Using eggs straight from the refrigerator is actually preferable with this method. Cold eggs going into a preheated air fryer at 270°F heat up gradually and evenly — which is exactly what you want. Room-temperature eggs in a dry heat environment can begin setting slightly faster on the outside, which risks unevenness. This is one of the counterintuitive advantages of the air fryer over the stovetop, where cold eggs dropped into boiling water are more likely to crack.
How long do air fryer hard-boiled eggs keep, and how should they be stored?
Unpeeled hard-boiled eggs will keep in the refrigerator for up to one week. Once peeled, store them submerged in a bowl of cold water, changing the water daily, and use them within three to four days. For Easter dyeing, dye the eggs before peeling and refrigerate them in their shells. Dyed eggs that have been peeled and left at room temperature for more than two hours should be discarded rather than eaten.
What if my air fryer runs hot — will the timing change?
Air fryers vary between brands, and some models run noticeably hotter than their display suggests. If your eggs come out with any green-grey tinge on the yolk, the internal temperature has gone too high — reduce the set temperature by 10°F (5–6°C) on your next batch and keep the time the same. If the yolk is slightly underset and soft at the centre after the ice bath, add two minutes to the cooking time. After one or two batches, you will know exactly how your machine behaves.
Can I use this method for soft-boiled eggs too?
Yes, with an adjusted time. At the same temperature — 270°F (130°C) — a soft-boiled egg with a fully set white and a runny, jammy yolk takes approximately 10 to 11 minutes, followed by the same ice bath. For a slightly firmer yolk that is still moist at the centre (the "jammy egg" texture popular in ramen and grain bowls), aim for 12 to 13 minutes. The ice bath remains non-negotiable regardless of doneness level.
Does the air fryer method work for dyeing Easter eggs?
It works particularly well for dyeing, for one practical reason: the shells come out of the air fryer completely dry, with no water residue or spotting from a boiling pot. Dye adheres more evenly to a dry, clean surface than to a wet or slightly damp one. Let the eggs cool fully in the ice bath, then dry them thoroughly with a clean towel before dyeing. A few drops of white vinegar added to your dye bath will intensify the colour uptake on the shell.