
Late March arrives with longer evenings and the kind of mild, restless energy that draws people back into the kitchen after months of hearty, slow-cooked winter fare. Sourdough focaccia, crafted with an overnight cold-rise, is the ideal bread for this transition: its open, airy crumb and golden, textured crust reflect patient technique, achieving its best qualities as it rests. The method hinges on a long, cold fermentation in the fridge — typically twelve to sixteen hours — during which wild yeast and bacteria work slowly, building a flavour depth that same-day focaccia can't match. That signature combination of a crisp, olive-oil-coated base, a soft interior full of large air pockets, and a subtly tangy finish isn't accidental: it results directly from controlled temperature and time.
This version uses an active sourdough starter rather than commercial yeast, changing the fermentation dynamics entirely, and giving the baker a more complex, slightly acidic crumb. The cold retard significantly slows gluten development, and prevents the wild yeast from exhausting overnight, so the dough is full of potential in the morning. Understanding what happens inside the dough at each stage — why the folds matter, why the oil pooling in the dimples is essential, why oven temperature is critical — turns this from a recipe into a repeatable technique. Get ready to master this worthwhile process.
| Preparation | 30 min (active) + 12–16 hrs cold rise |
| Rest | 2–3 hrs (room-temperature final proof) |
| Baking | 25–30 min |
| Portions | 8–10 generous slices |
| Difficulty | Medium |
| Cost | $ |
| Season | Spring herbs (rosemary, thyme), early-season cherry tomatoes, flaky sea salt |
Suitable for: Vegetarian · Dairy-free
Ingredients
For the dough
- 500 g bread flour (high-protein, 12–13% protein content)
- 375 g lukewarm water (75% hydration)
- 100 g active sourdough starter (100% hydration, fed 4–6 hours prior)
- 10 g fine sea salt
- 30 g extra-virgin olive oil (for the dough)
For the pan and topping
- 60 ml extra-virgin olive oil, divided (for the pan and surface)
- 2 tbsp fresh rosemary leaves, roughly chopped
- 1 tsp flaky sea salt (Maldon or similar)
- Optional: 8–10 cherry tomatoes, halved; 4–5 garlic cloves, thinly sliced; fresh thyme sprigs
Equipment
- Large mixing bowl (at least 4-quart capacity)
- Digital kitchen scale
- Bench scraper
- 9×13-inch (23×33 cm) rimmed baking pan or similar high-sided pan
- Plastic wrap or airtight container lid
- Instant-read thermometer
- Wire cooling rack
Preparation
Check your starter and mix the dough
Before beginning, check your starter is genuinely active: it should have doubled in size since feeding, smell pleasantly yeasty and sour (not acetone-sharp), and pass the float test — a small spoonful dropped in water should bob, not sink immediately. In a large bowl, combine the 375 g lukewarm water (around 28–30°C / 82–86°F) with the 100 g active starter, whisking briefly until the starter disperses into cloudy, slightly frothy water. Add the 500 g bread flour and mix with your hand or a stiff spatula until no dry flour remains and the dough forms a shaggy, rough mass. This initial mixing is called autolyse by some bakers, though strictly speaking, autolyse excludes the starter — here we are simply hydrating all the flour at once. Cover the bowl and allow the dough to rest for 30 minutes. During this rest, gluten strands are forming on their own without any mechanical effort, which will make subsequent handling far easier.
Add salt and olive oil, then begin the fold sequence
After the rest, sprinkle the 10 g fine salt directly over the dough, followed by the 30 g olive oil. The oil will feel initially resistant — the dough will slip and slide and appear to separate — but persevere. Squeeze the dough repeatedly through your fingers until the oil is fully incorporated and the mass feels cohesive again, which typically takes 2–3 minutes of firm, rhythmic squeezing. Now begin the first set of coil folds: wet your hands, reach under the dough from one side, lift it until the center begins to pull away from the bowl, then fold it back over itself. Rotate the bowl 90 degrees and repeat — four lifts constitute one set. Perform 4 sets of coil folds over 2 hours, spaced roughly 30 minutes apart. You will notice the dough becoming progressively smoother, more elastic, and more resistant to tearing with each set. By the fourth fold, it should hold its shape briefly when you pull it upward — that tension is gluten doing its work.
Shape loosely and refrigerate overnight
After the final fold, the dough should look noticeably more developed: smoother on the surface, slightly domed, with a subtle jiggle when you shake the bowl — a sign of active fermentation and trapped gas. Lightly oil the inside of a clean container or keep the dough in the same bowl, cover tightly with plastic wrap or a fitted lid, and place in the refrigerator. The temperature should be between 3–5°C (37–41°F). Leave it for a minimum of 12 hours and up to 16 hours — overnight is ideal. During this cold retard, fermentation continues at a dramatically slowed pace. The wild yeast produces carbon dioxide incrementally, and lactic acid bacteria generate the flavour compounds — primarily lactic and acetic acids — that give sourdough its characteristic tang. Rushing this stage by using a warmer temperature or shorter time produces a milder, less interesting bread.
Transfer to the pan and let the dough warm up
The next morning, pour 40 ml of olive oil into your baking pan and spread it across the entire surface and up the sides using your hands or a brush — this generosity is not optional. Remove the dough from the refrigerator; it will be cold, stiff, and noticeably puffier than when it went in. Gently coax it out of the container with a bench scraper and lay it in the oiled pan. Do not press it yet. Simply fold the dough over itself once or twice to create a rough rectangle, turn it oil-side-up, and leave it uncovered (or loosely tented with oiled plastic wrap) at room temperature for 2 to 3 hours. As the dough warms, it will relax and spread toward the edges of the pan on its own. Every 30–45 minutes, use your fingertips to gently push the dough outward toward the corners, but never force it — if it springs back immediately, it needs more time. Patience here prevents tearing and preserves the gas structure built overnight.
Dimple, dress, and bake
Preheat your oven to 230°C (450°F) — or as high as your oven will reliably go — at least 30 minutes before baking. The pan should go into a very hot oven. Once the dough has spread to fill the pan and looks pillowy and relaxed, it is ready for dimpling: drizzle the remaining 20 ml olive oil over the surface, then press all ten fingers firmly and decisively into the dough, driving them nearly to the bottom of the pan. Do not be timid — those deep dimples are structural, not decorative. They trap pockets of oil and create the uneven surface that gives authentic focaccia its identity. Scatter the fresh rosemary, flaky salt, and any optional toppings (cherry tomatoes pressed cut-side-up, garlic slices) across the surface. Slide the pan into the oven on the lowest rack, where the intense bottom heat will crisp the underside in the pooled olive oil. Bake for 25–30 minutes, until the surface is a deep, even golden-brown — the color of toasted hazelnuts — and the edges pull slightly from the sides of the pan. If the top browns before the underside is done, lower the rack for the final 5 minutes.
Rest before cutting
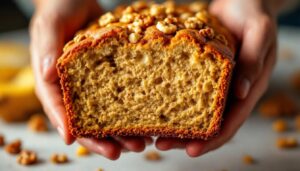
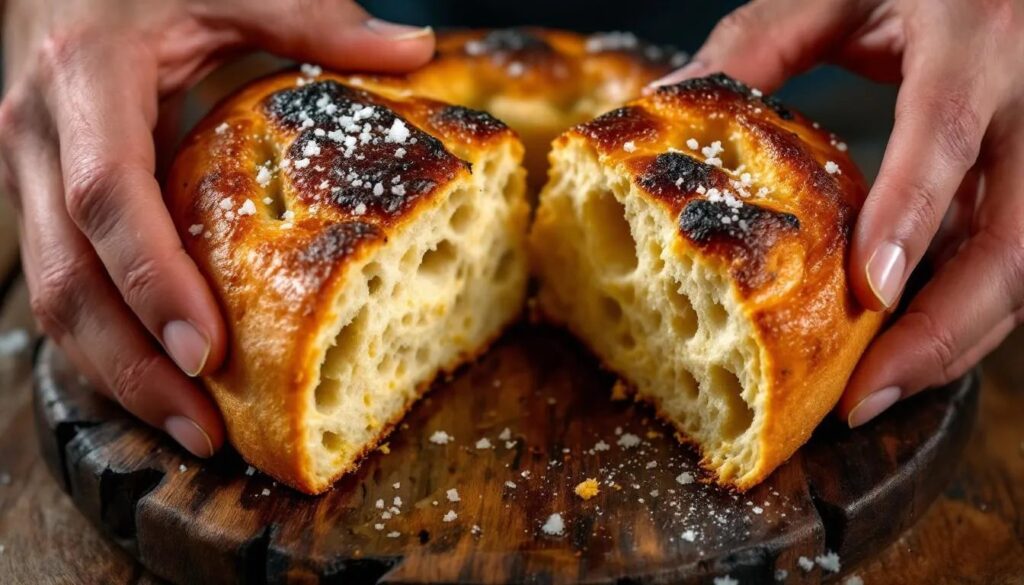
Remove the focaccia from the oven and immediately slide it out of the pan onto a wire cooling rack using a bench scraper. Leaving it in the pan traps steam and softens the crust you worked to achieve. Listen: the underside should sound hollow when tapped. Allow it to rest for at least 15 minutes before cutting — the crumb is still setting during this period, and cutting too early collapses the open structure. When you finally slice through it, the interior should reveal an irregular, open network of air pockets in varying sizes, the larger ones concentrated near the surface where the dimples were pressed, surrounded by a honeyed, translucent crumb that is simultaneously chewy and light.
My Chef's Tip
The single most common reason sourdough focaccia lacks large air pockets is that the dough was handled too aggressively during the final proof. Once the cold dough goes into the pan, treat it with genuine care — never punch it down, never fold it again. Those bubbles you see forming under the surface in the final two hours are exactly what you want to preserve. In spring, when young rosemary shoots are tender and intensely fragrant, use them in generous quantities: they perfume the oil as the focaccia bakes and release a floral, resinous aroma that is quite different from the woodier winter herb. If your starter runs on the milder side, extend the cold retard to 16 hours — the extra time amplifies acidity without overproofing.
Pairing Suggestions
Sourdough focaccia has a complex flavour profile — wheaty, faintly acidic, rich with olive oil, herbal from the rosemary — that pairs well with both wines and non-alcoholic alternatives that complement the bread's subtlety.
A young, unoaked Italian white such as a Vermentino di Sardegna works particularly well: its saline minerality and citrus brightness echo the olive oil and sea salt without competing. A dry, peppery Verdicchio from Marche is an equally sound choice. For a non-alcoholic option, a sparkling water with a squeeze of lemon and a few drops of good olive oil alongside — served as a dipping ritual rather than a pairing — keeps the focus on the bread itself. If the focaccia is topped with cherry tomatoes and garlic, a light, chilled Barbera d'Asti bridges the acidity of the tomatoes with ease.
About This Bread
Sourdough focaccia is one of the oldest leavened flatbreads in the Mediterranean world, with roots tracing back to ancient Liguria in northwestern Italy, where it has been continuously made for centuries under the local name fugassa. The Genoese version — focaccia genovese — remains the canonical reference: thin, deeply oiled, dimpled, and topped with nothing more than coarse salt and sometimes olive brine. The use of sourdough starter rather than commercial yeast is, historically, the original method; commercial yeast only displaced natural fermentation in home baking during the twentieth century, and the current revival of sourdough is in many ways a return to how this bread was always made.
Regional variations across Italy are extensive. Focaccia di Recco, from the Ligurian coast, is an entirely different beast — an unleavened, paper-thin pastry filled with fresh cheese, bearing almost no resemblance to its namesake. Pugliese focaccia tends to be thicker and soupier with olive oil, often studded with cherry tomatoes that collapse into the crumb during baking. The Sicilian sfincione layers tomato, onion, and aged cheese on a thick, spongy base closer to a Roman-style pizza. The cold overnight method described here is not tied to one regional tradition but draws from contemporary high-hydration sourdough baking that has spread across bakeries in London, New York, Copenhagen, and Melbourne over the past decade — a technique that privileges flavour and texture above speed.
Nutritional Information (per serving, approximate values)
| Nutrient | Amount |
|---|---|
| Calories | ~285 kcal |
| Protein | ~7 g |
| Carbohydrates | ~42 g |
| of which sugars | ~1 g |
| Fat | ~10 g |
| Fiber | ~2 g |
Frequently Asked Questions
My dough didn't develop many air pockets — what went wrong?
The most likely cause is either an underactive starter or excessive handling during the final proof. Ensure your starter doubles reliably within 4–6 hours of feeding before using it in this recipe. During the room-temperature final proof in the pan, avoid pressing or folding the dough — only use gentle outward nudges with your fingertips. Overworking degasses the structure that cold fermentation spent hours building. Additionally, check your oven temperature with a separate thermometer: many home ovens run significantly cooler than their displays indicate, and a too-cool oven produces a dense crumb.
Can I make this without a sourdough starter?
Yes, with adjustments. Replace the 100 g starter with 3 g (¾ tsp) active dry yeast dissolved in the water, reduce the water slightly to 350 g to compensate for the starter's hydration contribution, and shorten the overnight cold rise to 8–10 hours, as commercial yeast works faster than wild yeast even under refrigeration. The result will be a well-structured, pleasant focaccia, but it will lack the tangy depth and complex aroma that slow wild fermentation produces.
How should leftover focaccia be stored, and can it be reheated?
Store cooled focaccia wrapped in a clean cloth or paper bag at room temperature for up to 2 days — plastic wrap traps moisture and softens the crust prematurely. To reheat, place slices directly on the oven rack or a hot baking sheet at 200°C (400°F) for 5–7 minutes, which revives the crust. Focaccia also freezes well: slice it, freeze the pieces flat on a tray, then transfer to a freezer bag. Reheat directly from frozen at 200°C for 10–12 minutes.
Can I prepare the dough further in advance — say, 24 hours or more?
A cold retard of up to 24 hours is workable and will intensify the sour flavour noticeably. Beyond 24 hours, the dough risks over-fermentation: the gluten network begins to break down, resulting in a slack, sticky dough that spreads rather than holds structure, and the flavour tips into aggressively sour territory. If your schedule requires more flexibility, retard the dough for 12–14 hours, then, after transferring to the pan, extend the final room-temperature proof by an additional hour.
What spring toppings work particularly well with this method?
Late March and April offer some excellent options for topping focaccia before baking. Thinly sliced spring onions caramelise beautifully in the olive oil. Fresh or jarred artichoke hearts, halved and pressed lightly into the dimples, are a traditional Ligurian accompaniment. Early-season asparagus tips, laid across the surface and drizzled with extra oil, roast quickly in the hot oven. A scatter of Castelvetrano olives adds brininess that amplifies the sour notes of the sourdough crumb. Keep toppings sparse — the bread itself is the focus.