There is a moment in cast iron cornbread that no other baking pan can replicate: the instant the batter hits a smoking-hot skillet and lets out a fierce, decisive hiss. That sound is the crust forming — not in the oven, not gradually, but right there, in a single violent second of contact. Late March sits at the edge of something: winter's heavy stews are losing their grip, the first warm weekends invite something rustic and shareable, and cornbread bridges that gap with ease. It is the kind of bread that asks for nothing elaborate — no proofing, no shaping, no patience — just a well-seasoned cast iron skillet and the knowledge of one technique that changes everything.
Most home bakers skip the preheat step and wonder why their cornbread comes out pale-bottomed, soft-sided, and forgettable. This recipe does not skip it. The skillet goes into the oven first, alone, until it is hot enough to sear. When the batter lands, the bottom crust sets instantly — lacquered, almost crackling — while the interior stays tender and just barely sweet. You will also learn how fat choice, cornmeal grind, and oven position each play a specific, non-negotiable role. Tie on your apron.
| Preparation | 10 min |
| Cooking | 22–25 min |
| Portions | 8 wedges |
| Difficulty | Easy |
| Cost | $ |
| Season | Year-round · especially suited to spring gatherings and weekend brunches |
Suitable for: Vegetarian
Ingredients
- 1 ½ cups stone-ground yellow cornmeal (medium or coarse grind — not fine, not instant)
- ½ cup all-purpose flour
- 1 ½ tsp baking powder
- ½ tsp baking soda
- 1 tsp fine sea salt
- 1 tbsp granulated sugar (optional — see chef's note)
- 2 large eggs, room temperature
- 1 ¾ cups full-fat buttermilk, well shaken
- 3 tbsp unsalted butter, melted and slightly cooled
- 2 tbsp lard or bacon fat (for the skillet — this is what creates the crust)
Equipment
- 10-inch (25 cm) cast iron skillet, well seasoned
- Large mixing bowl
- Medium mixing bowl
- Whisk
- Rubber spatula
- Oven mitts (heavy-duty — the skillet handle will be extremely hot)
- Cooling rack
Preparation
1. Heat the skillet — this step is not optional
Position your oven rack in the lower third of the oven, not the middle. Place the empty cast iron skillet directly on the rack. Heat to 230°C / 450°F (conventional, not fan-assisted) and let the skillet preheat for a minimum of 15 minutes — ideally 20. The goal is a pan that reaches the same temperature as the oven air around it, which conventional thermometers cannot verify. Cast iron is dense and slow to heat through; pulling it out at 10 minutes means the centre of the base is still cold, and you will lose the crispy bottom before the batter even enters the equation. While the skillet heats, mix your batter — the timing works perfectly.
2. Combine the dry ingredients
In a large bowl, whisk together the cornmeal, flour, baking powder, baking soda, salt, and sugar if using. Take a moment here to notice the texture of the cornmeal between your fingers: a medium or coarse stone-ground meal feels almost gritty, with visible flecks of bran and germ. This is exactly what you want. Pre-gelatinized or "instant" cornmeal — the kind found in most supermarket boxes — has been heat-processed to cook faster, but it produces a fluffier, more cake-like crumb with far less character. Whisk the dry ingredients thoroughly so that the leavening agents are evenly distributed throughout; uneven distribution leads to a cornbread that domes and cracks unevenly.
3. Whisk the wet ingredients separately
In a medium bowl, crack in the eggs and beat them lightly with a fork. Pour in the buttermilk and whisk until fully combined. Add the melted butter — make sure it has cooled slightly so it does not begin to cook the eggs — and whisk again until the mixture is uniform. The buttermilk performs two functions here: its acidity reacts with the baking soda to produce carbon dioxide bubbles that lighten the crumb, and its fat content keeps the texture moist without heaviness. If you do not have buttermilk, measure 1 ¾ cups of whole milk, stir in 1 ½ tablespoons of white wine vinegar or lemon juice, and let it sit for 5 minutes. The result is a functional substitute, though the tang will be slightly less pronounced.
4. Combine wet and dry — gently, and not a stroke more
Pour the wet mixture into the dry ingredients all at once. Using a rubber spatula, fold the batter together with broad, deliberate strokes. Stop as soon as the dry flour disappears — the batter will look rough, almost lumpy, with a few streaks that seem underworked. This is correct. Overmixing develops gluten in the flour, which gives cornbread a tough, rubbery texture and inhibits the rise. In quick breads and batters of this type, less mixing always produces a better result. The batter should be pourable but thick, falling from the spatula in heavy ribbons. Let it sit undisturbed for 2 minutes while you prepare the skillet.
5. Fat into the skillet — the defining moment
Put on your heaviest oven mitts. Remove the screaming-hot skillet from the oven and set it on a heat-safe surface. Add the 2 tablespoons of lard or bacon fat directly to the centre of the pan. It will smoke immediately and spread on its own across the surface — tilt the skillet carefully to coat the sides as well. Lard has a higher smoke point than butter and gives the crust a deeper, more savoury sear; butter burns at this temperature and can leave a bitter note. Work quickly: the fat should coat the pan in under 20 seconds before it begins to darken.
6. Pour the batter and return to the oven immediately
Pour the batter directly into the centre of the greased skillet in one smooth motion. You will hear — and should hear — a sharp, sustained hiss as the cold batter makes contact with the hot metal. This is the crust forming. Do not stir, do not swirl, do not adjust. Slide the skillet back onto the lower-third rack and close the oven door. Bake for 22 to 25 minutes, until the top is deep golden-brown with a few darker edges, and a wooden skewer inserted into the centre comes out clean or with a few moist crumbs. Do not open the oven before the 20-minute mark.
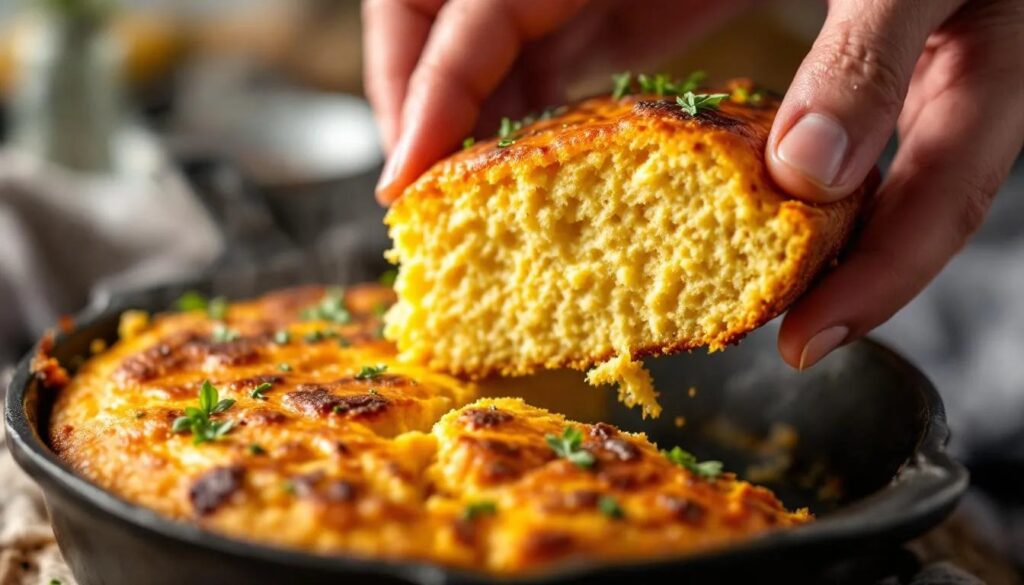
7. Rest briefly, then invert
Remove the skillet from the oven and let it sit for 3 minutes on the cooling rack — no longer. Run a thin offset spatula or butter knife along the edges to loosen any points of contact. Invert the skillet confidently over a cutting board: the cornbread should release cleanly and fall out in one piece, revealing a base that is darkly lacquered, almost mahogany in colour, with a texture that gives a faint crunch when you tap it with a fingernail. Slice into wedges and serve immediately while the crust is at its peak.
Chef's note
The sugar debate in cornbread runs deep and regional, and you should know where you stand before you bake. Southern American tradition is adamantly unsweetened — cornbread is a savory bread, meant to accompany beans, greens, and braised meats. Northern and Midwest recipes frequently include 2 to 4 tablespoons of sugar, resulting in something closer to a moist corn cake. This recipe calls for just 1 tablespoon as a baseline — enough to coax a faint caramelisation on the crust without crossing into dessert territory. In spring, when the first green onions and ramps appear at the market, try folding in 3 tablespoons of finely sliced scallions and a pinch of cayenne into the batter. The cornbread becomes something else entirely: sharp, fragrant, and impossible to stop eating.
Pairing suggestions
Cast iron cornbread has a rich, slightly smoky profile from the seared lard crust and the earthy depth of stone-ground cornmeal. It wants something with body and a degree of acidity to cut through the fat.
For a savoury pairing, serve alongside a slow-cooked pork shoulder or a pot of white beans braised with smoked ham hock — the cornbread doubles as a utensil, soaking up the braising liquid. If you are reaching for a drink, a cold, well-carbonated hard cider from the American Northeast — dry, not sweet — cuts through the richness cleanly. A glass of cold whole milk remains the classic companion, and for good reason: it tempers the crust's intensity and highlights the corn's natural sweetness. If serving as part of a brunch spread this spring, pair with a poached egg and a spoonful of hot honey.
A brief history of cast iron cornbread
Cornbread is one of the oldest dishes in North American foodways, descending directly from Indigenous techniques of grinding dried corn into meal and cooking it over fire. Before European settlers arrived, versions of corn cake were baked on flat stones or wrapped in corn husks and buried in embers. The cast iron skillet — which became widely available to American households through the 18th and 19th centuries — transformed this tradition into something more refined and structurally confident. The preheated-skillet technique, now sometimes discussed as though it were a recent discovery, was in fact standard practice in wood-fired kitchens where the iron sat permanently at heat, always ready.
Regional variations remain distinct to this day. In Appalachian cooking, white cornmeal and no sugar are non-negotiable. In Texas, jalapeños and sharp cheddar are folded in as a matter of course. In the carolina low country, cornbread is baked thinner, almost like a flatbread, and eaten with sweet tea. What connects all of these versions is the cast iron itself — a pan that transfers heat with an intensity that no aluminium or ceramic bakeware can approach, and that builds its seasoning with every use, becoming better the more it is cooked in.
Nutritional values (per wedge, approximate values)
| Nutrient | Amount |
|---|---|
| Calories | ~230 kcal |
| Protein | ~6 g |
| Carbohydrates | ~31 g |
| of which sugars | ~3 g |
| Fat | ~9 g |
| Fiber | ~2 g |
Frequently asked questions
Can i use a different fat in the skillet instead of lard?
Lard or bacon fat is strongly recommended because of their high smoke points and the flavour they impart to the crust. Refined coconut oil works as a neutral, plant-based alternative with a comparable smoke point. Vegetable shortening is a reasonable substitute. Butter and extra-virgin olive oil will burn at the temperatures required for this technique and should be avoided for the skillet-coating step — though butter in the batter itself is fine.
My skillet is 12 inches, not 10. Does that matter?
Yes, significantly. A 12-inch skillet will spread the same batter into a thinner layer, reducing the bake time to approximately 18–20 minutes and producing a cornbread that is crispier throughout but with less tender interior height. If a 12-inch is all you have, increase the recipe by 25% to compensate for the larger surface area, and begin checking for doneness at the 18-minute mark.
Can this cornbread be made ahead of time?
Cornbread is best eaten within 2 hours of baking, when the crust is at its most pronounced. That said, leftovers keep well at room temperature wrapped in a clean kitchen towel for up to 2 days. To revive the crust, place wedges cut-side down in a dry cast iron skillet over medium heat for 2–3 minutes — this re-crisps the bottom and warms the crumb simultaneously. Do not microwave: it steams the crust into softness and loses the entire point of the technique.
What is the difference between stone-ground and degerminated cornmeal?
Stone-ground cornmeal retains the bran and germ of the corn kernel, which contributes oil, flavour complexity, and a slightly coarser texture. It has a shorter shelf life because those natural oils can turn rancid — store it in the refrigerator or freezer. Degerminated cornmeal (labelled simply "cornmeal" on most American supermarket shelves) has had those components removed for a longer shelf life and a finer, more uniform texture. It produces a blander, softer cornbread. For this recipe, stone-ground is not just preferred — it is the source of the flavour that makes the technique worth bothering with.
Why is the oven rack position in the lower third so important?
Cast iron radiates heat upward from its base, meaning the bottom of the cornbread is already cooking aggressively from the moment the batter hits the pan. Placing the skillet in the lower third of the oven brings the top of the cornbread closer to the oven floor's ambient heat, helping the centre set before the top surface over-browns. The middle rack produces a correctly browned top but a slightly underdone centre; the upper rack risks a pale, dense interior. The lower-third position balances all three zones of the bread simultaneously.