


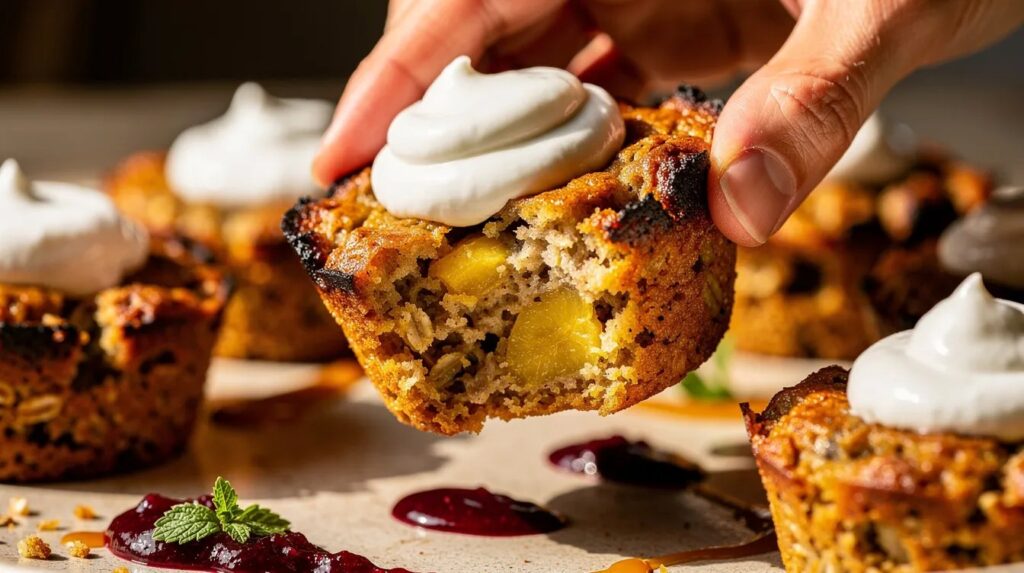
Ripe bananas, a jar of rolled oats and a tub of thick Greek yoghurt — that is all it takes to set a batch of golden oatmeal cups in the oven and fill the kitchen with a warm, toasty sweetness that lingers well into the afternoon. As autumn settles across Australia and mornings turn cool, a make-ahead breakfast you can grab straight from the fridge becomes less of a luxury and more of a weekday necessity. These baked oatmeal cups solve the perennial problem of choosing between something wholesome and something you actually look forward to eating.
Each cup bakes into a soft, lightly caramelised square that holds its shape without crumbling, thanks to the natural binding power of mashed banana and the gentle richness of Greek yoghurt stirred right into the batter. The yoghurt keeps the crumb moist for days, adds a subtle tang that balances the banana's sweetness, and bumps up the protein count so you are not reaching for a second breakfast by ten o'clock. Make twelve on a Sunday evening and your mornings are sorted until Friday — no standing at the stove, no sticky saucepan. Time to pull out a mixing bowl and a muffin tin.
| Preparation | 10 min |
| Cooking | 22 min |
| Portions | 12 cups |
| Difficulty | Easy |
| Cost | $ |
| Season | Bananas, oats — available year-round; ideal autumn meal prep |
Suitable for: Vegetarian · Gluten-free (use certified GF oats) · High in protein · Nut-free (omit optional add-ins)
Ingredients
For the oatmeal cups
- 3 large ripe bananas (about 360 g peeled — the browner the skin, the sweeter the cup)
- 200 g rolled oats (not instant)
- 170 g Greek yoghurt (full-fat for best texture)
- 2 large eggs
- 2 tablespoons honey or maple syrup
- 1 teaspoon pure vanilla extract
- 1 teaspoon ground cinnamon
- 1 teaspoon baking powder
- ¼ teaspoon fine salt
Optional add-ins
- 80 g dark chocolate chips
- 60 g walnuts or pecans, roughly chopped
- 40 g desiccated coconut
- 1 tablespoon chia seeds
Utensils
- 12-hole standard muffin tin
- Non-stick cooking spray or paper liners
- Large mixing bowl
- Fork or potato masher
- Whisk
- Wire cooling rack
Preparation
1. Preheat and prepare the tin
Set the oven to 180 °C (fan-forced) or 190 °C conventional. Give each muffin cavity a generous coat of cooking spray, making sure to cover the rim where batter tends to cling. If you prefer paper liners, press them snugly into each hole — the cups will peel away cleanly once cool. Placing the tin on the middle rack of the oven ensures even heat circulation, so position the shelf before the oven climbs to temperature.
2. Mash the bananas
Peel the bananas into a large mixing bowl and crush them with a fork or potato masher until you reach a mostly smooth purée with a few small lumps remaining. Those small pieces will turn jammy in the oven and create pockets of concentrated banana flavour throughout each cup. Very ripe bananas — the kind with dark brown speckles all over the skin — break down faster and carry a deeper, almost caramel-like sweetness that reduces the need for added sugar. If your bananas are only mildly ripe, add an extra tablespoon of honey to compensate.
3. Mix the wet ingredients
Crack the eggs into the bowl with the banana and whisk until combined. Add the Greek yoghurt, honey and vanilla extract, then stir with broad strokes until you have a smooth, pale-gold batter. The yoghurt's acidity will react with the baking powder later, creating a gentle lift that stops the cups from turning dense. You want a thoroughly blended base here, with no streaks of white yoghurt visible — about thirty seconds of brisk stirring does the job.
4. Fold in the dry ingredients
Tip the rolled oats, cinnamon, baking powder and salt directly into the wet mixture. Use a spatula or large spoon and fold — lifting from the bottom and turning over — until every oat flake is coated. Avoid vigorous stirring; oats absorb liquid quickly and the batter will thicken as you work. Let it sit for 3–4 minutes. During this short rest the oats soften slightly, which helps the cups bake evenly and gives them a tender, almost cake-like interior rather than a dry, granola-bar texture. If you are using chocolate chips, nuts or coconut, fold them in after the rest so they stay evenly distributed.
5. Fill the tin
Divide the batter evenly among the twelve muffin holes. A standard ice-cream scoop (about 60 ml) gives consistent portions and keeps the rims clean. Each cavity should be roughly three-quarters full — the cups rise only a little, so there is no risk of overflow. Tap the tin firmly on the bench once to settle the batter and release any trapped air bubbles. If you like a bit of visual flair, press a few extra banana slices or a scattering of oats onto the surface of each cup before they go into the oven.
6. Bake until golden and set
Slide the tin into the oven and bake for 20–22 minutes. Look for edges that have turned a warm, toasted gold and centres that spring back when pressed lightly with a fingertip. A toothpick inserted into the middle of a cup should come out clean or with just a moist crumb clinging to it — any wet batter means another two minutes in the oven. The tops will feel slightly tacky when hot; they firm up as they cool. Let the cups sit in the tin for 5 minutes before running a butter knife around each edge and transferring them to a wire rack. The steam escaping underneath prevents soggy bottoms.
7. Cool and store
Once fully cooled — about 20 minutes on the rack — the cups are ready to eat or to pack away for the week. Stack them in an airtight container with squares of baking paper between layers and refrigerate for up to 5 days. They also freeze beautifully: wrap each cup individually in cling film, place them in a zip-lock bag and freeze for up to 3 months. To reheat, microwave a single cup for 30–40 seconds straight from the fridge, or 60 seconds from frozen — the centre turns warm and the edges stay just firm enough to hold in your hand on the way out the door.
My chef's tip
Swap a third of the rolled oats for quinoa flakes — they cook in the same time but contribute a complete protein and a subtle nuttiness that pairs well with banana. As the weather cools in April and May, stir a tablespoon of natural peanut butter or tahini into the wet mixture for extra warmth and satiety. If you want a lighter cup with more lift, separate the eggs: fold the yolks into the banana base and whisk the whites to soft peaks before folding them through last. The texture shifts from dense and chewy to almost soufflé-like — a small extra step that transforms a practical breakfast into something worth slowing down for.
Beverage pairings
The banana-cinnamon profile of these cups lends itself to warm, malty and lightly spiced drinks rather than anything too sharp or fruity.
A flat white made with full-cream milk is the natural partner — its velvety microfoam echoes the yoghurt's creaminess, while the espresso cuts through the sweetness of the banana. For a caffeine-free option, try a golden turmeric latte sweetened with a drizzle of the same honey you used in the batter; the ginger and turmeric brighten every bite. On cooler mornings, a pot of chai tea — brewed strong with cardamom, clove and a cinnamon stick — amplifies the warm spice notes already baked into each cup.
More about baked oatmeal
Baked oatmeal has its origins in the Amish communities of Pennsylvania, where a large pan of sweetened oats was cut into squares and served family-style at breakfast. The concept transitioned to individual portions in the mid-2010s as meal-prep culture embraced the muffin tin as the ultimate portioning tool. Baking oats, rather than simmering them, changes their texture from porridge to something closer to a soft flapjack: structured enough to hold, moist enough to stay interesting.
Adding Greek yoghurt is a more recent twist, popular in Australian and New Zealand kitchens where thick pot-set yoghurt is a pantry staple. The yoghurt contributes moisture, protein and a lactic tang that balances the sweetness. There are many variations: blueberry and lemon zest in summer, grated apple and nutmeg in winter, or passionfruit curd swirled through the top. The base recipe remains the same; only the fruit and the spice change with the season.
Nutritional values (per cup, approximate values)
| Nutrient | Amount |
|---|---|
| Calories | ~145 kcal |
| Protein | ~6 g |
| Carbohydrates | ~23 g |
| of which sugars | ~9 g |
| Fat | ~3 g |
| Fibre | ~2.5 g |
Frequently asked questions
Can these oatmeal cups be made ahead?
They are designed precisely for that purpose. Bake a full batch on the weekend, let them cool completely, then refrigerate in an airtight container for up to five days. The yoghurt in the batter keeps them moist throughout the week, so Monday's cup tastes just as good as Sunday's. Reheat in the microwave for 30–40 seconds or enjoy them cold.
How should leftovers be stored?
In the fridge, stack the cups in a sealed container with baking paper between layers to prevent sticking. For longer storage, wrap each cup individually in cling film and freeze in a zip-lock bag for up to three months. Thaw overnight in the fridge, or microwave from frozen for about 60 seconds until warmed through.
What substitutions work well?
Replace Greek yoghurt with coconut yoghurt for a dairy-free version — the texture holds up well, though the tang is milder. Mashed sweet potato or pumpkin can substitute banana; use the same weight and add an extra tablespoon of honey. For a vegan option, swap the eggs for two tablespoons of ground flaxseed mixed with five tablespoons of water, rested for five minutes until gel-like.
Are these suitable for toddlers and young children?
The soft texture and mild flavour make them a good finger food for children over twelve months. Omit the honey for babies under one year (use a little extra mashed banana instead) and skip whole nuts, using nut butter stirred into the batter if you want that flavour. The cups are easy to hold, low in added sugar and free from artificial ingredients.
Can I use instant oats instead of rolled oats?
You can, but the result will be noticeably different. Instant oats absorb liquid much faster and break down during baking, producing a cup with a softer centre rather than the chewy texture rolled oats give. If instant oats are all you have, reduce the resting time in step four to one minute. Steel-cut oats are too firm and will not soften enough in the oven.